
Google Analytics 4 is here to stay, but what are the best practices and tips for setting up your dashboard?
Universal Analytics is out, and Google Analytics 4 is in.
GA4 offers a wealth of powerful features to help you gain valuable insights into your website and traffic performance, but with great power comes the need for a solid foundation.
This blog will guide you through the essential steps and best practices to set up GA4, ensuring you get the most value out of your reporting.
Skip to:
💡 Pro Tip
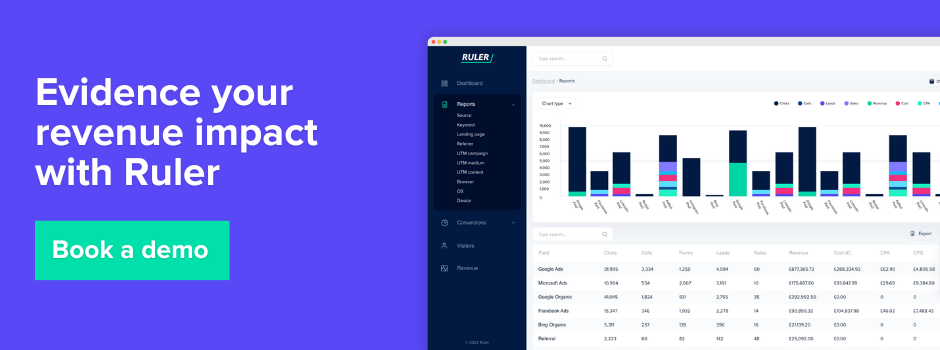
Ruler makes a great addition to Google Analytics. Unlike Google Analytics, Ruler tracks your data on a visitor level, allowing you to successfully attribute leads and revenue across multiple sessions, campaigns, ads, keywords and more.
Book a demo to see how Ruler works with GA4
How to set up Google Analytics 4
Let’s start from the beginning so that we’re all on the same page.
If you’re new to Google Analytics or want to create a new GA4 property (and are not using the Upgrade to GA4 option), you can get started by following the steps below.
If you’ve already set up your GA4 property, you can skip this section.
Step 1: Create your GA4 property
To create your Google Analytics 4 account, head to the admin section of your current GA account.
Click Create Property.
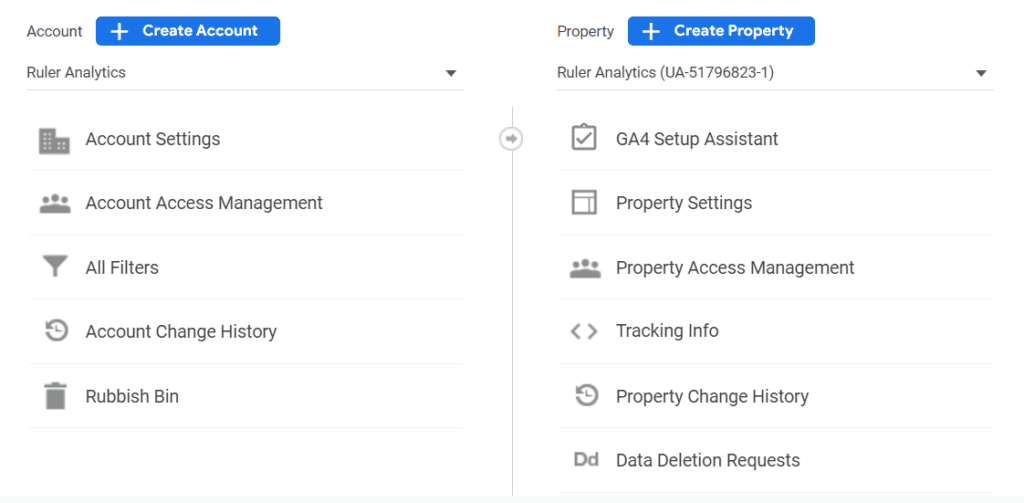
You can also use the Google Analytics 4 Setup Assistant wizard if you want a walkthrough of the setup.
Once you’ve clicked that, you’ll be taken to a new screen.
Here, you’ll need to write in the name of your property. This can just be your business name.
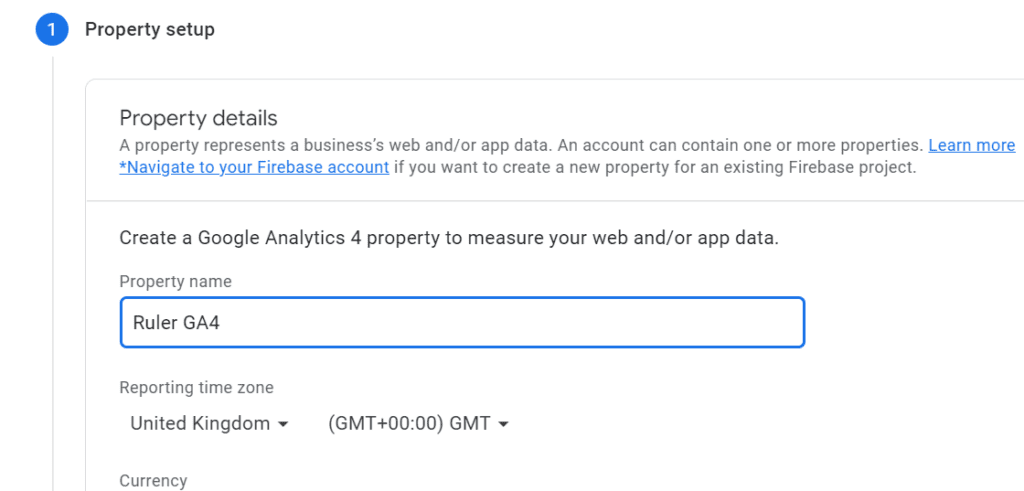
Choose your timezone and your currency and then click Next.
You’ll then be asked a few questions including your industry and company size.
You will also be asked why you’re using Google Analytics 4.
Select the options most appropriate for you and then click Create.
Step 2: Create a web data stream
Now that your account is created, you next need to create a data stream. Unlike Universal Analytics, you can now send multiple measurement IDs into one Google Analytics account.
You can create data streams for iOS, Android and web users. There is a limit of up to 50 data streams on your Google Analytics 4 property.
When creating your data stream, you’ll see the below prompt.
Be sure to enable enhanced measurement as this allows you to automatically track interactions like file downloads, outbound clicks and more.

Step 3: Connect your Google Analytics account to your site
If you already had a Universal Analytics account and used Google’s Setup Assistant wizard, this will do the hard work for you when it comes to implementing your new account.
If not, then you may need to investigate how to properly connect your GA4 account to your site either via your CMS or Google Tag Manager.
Learn more on how to set this up properly via Google.
The best practices for Google Analytics 4
Setting up your Google Analytics property is just the beginning. You need to implement a few key practices to get the most out of your data. Here are a few practices for optimal data collection:
- Attribution modelling
- Data retention
- Define internal traffic
- Set up custom events
- Connect to other Google products
- Create custom reports
Attribution modelling
As you may know, Google has removed several attribution models from GA4 and Google Ads, leaving only last-click and data-driven attribution available.
The following attribution models are no longer available in GA4:
- First-click
- Linear
- Time decay
- Position based
Google says that these attribution models are not sophisticated, accurate, or flexible enough to track the complex customer journeys of today.
As a result, data-driven attribution is now the default model in Google Analytics 4. You can switch to last-click attribution by going to Admin > Attribution Settings. Just choose from the drop-down field to select your desired attribution model.

In the same section, you can also change your attribution window based on what type of business or campaigns you’re running. Most marketers opt for data-driven attribution and the maximum number of days. For acquisition events, it’s 30 days. And for all other conversion events, it’s 90 days.
While data-driven attribution is touted as the most accurate model, it does present some flaws.
Firstly, data-driven attribution relies on online data, which means it may not provide a complete picture of the customer journey, particularly if there are any offline touchpoints or conversions.
Second, GA4 can’t reveal how data-driven attribution assigns credit to each touchpoint or channel.
In order to get the most out of your data, you should consider using a marketing attribution tool alongside GA4.
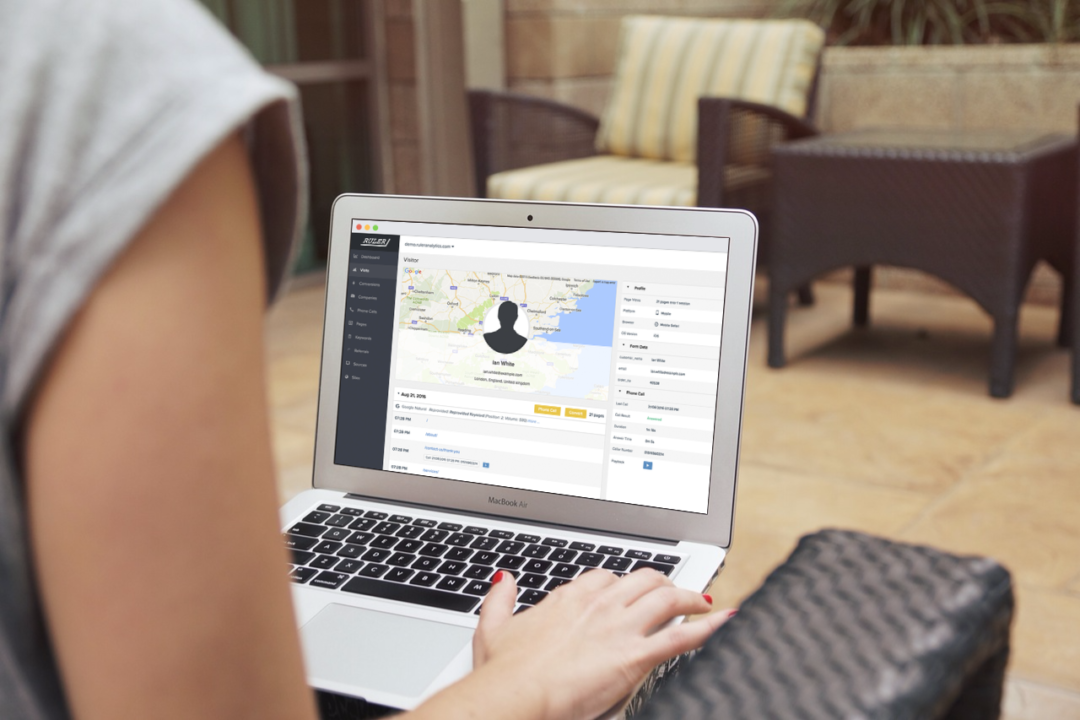
Marketing attribution tools like Ruler track users to different touchpoints across multiple sessions. For example, a user may arrive on your website after opening an email or clicking a social media ad.
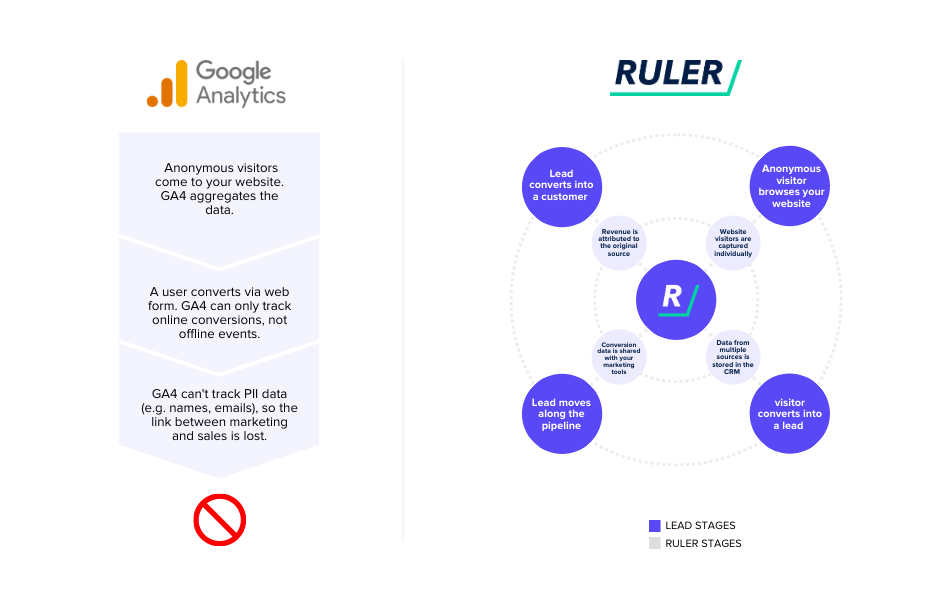
When a user converts, their details are matched with their unique journey. And by integrating with your CRM and other marketing tools, you can see where your highest (and lowest) quality leads came from and how far they made it down the funnel.
With Google Analytics and marketing attribution together, you can show the impact your website and marketing have on pipeline generation with more confidence.
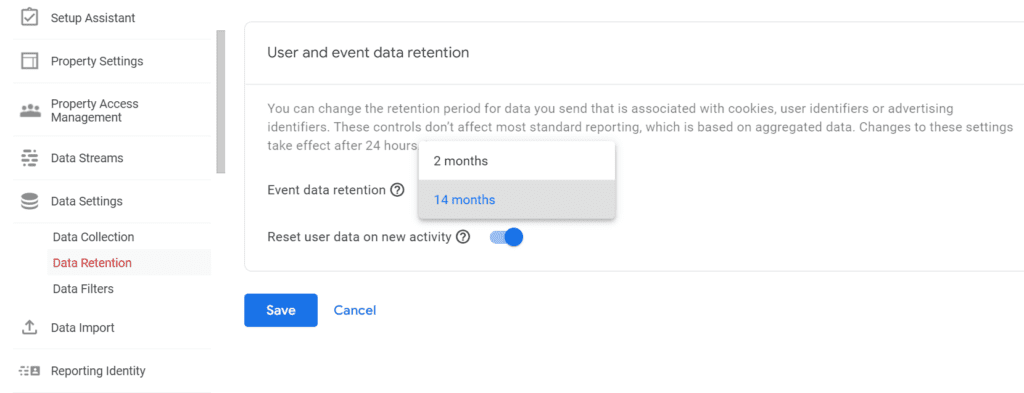
Data retention
Similarly to Universal Analytics, there is a data retention setting within your account where you can set how long GA retains data before deletion.
We recommend pushing your data retention to 14 months, the maximum.
You can do this easily.
Head to Property, then Data Settings < Data Retention.
Click Save and you’re done!
Define your internal traffic
You probably set this up so long ago in your Universal Analytics account that you forgot it existed.
But one important task to do before you start analysing your data is to exclude any internal traffic of people who regularly use the site but aren’t potential leads.
Similar to the View < Filters in Universal Analytics, Google Analytics 4 has a similar setting.
Head to Data Settings and then select Data Filters.
By default, GA4 will automatically create a filter to exclude internal traffic.
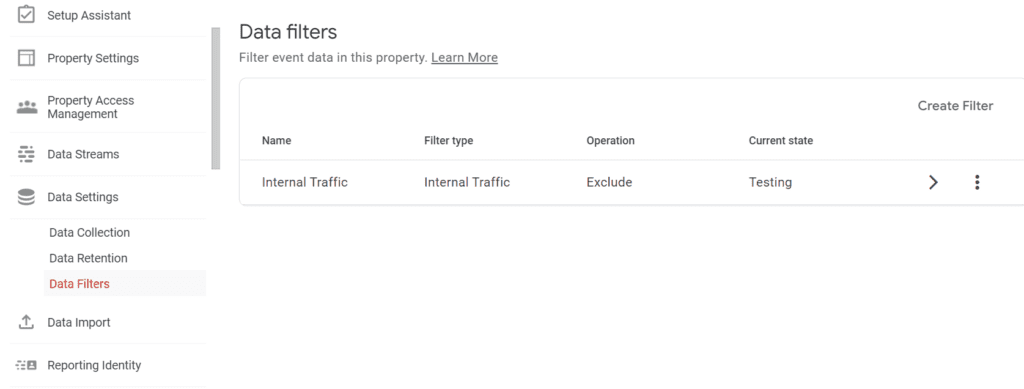
However, you will need to configure this a little.
- Head to Data Streams, select your stream and then click Tagging Settings
- Select Define internal traffic and click Create
- In Configuration, enter a Rule name, e.g., Office and enter the IP address to be excluded
- Select Save

To apply this filter, navigate to Data Settings > Data Filters and then select the internal traffic filter that you just created.
Here you’ll be able to change its state.
There are three options:
- Testing: The filter doesn’t permanently change the data but can be identified with the dimension name ‘test data filter’
- Active: The filter permanently changes data
- Inactive: The filter is not considered when processing data
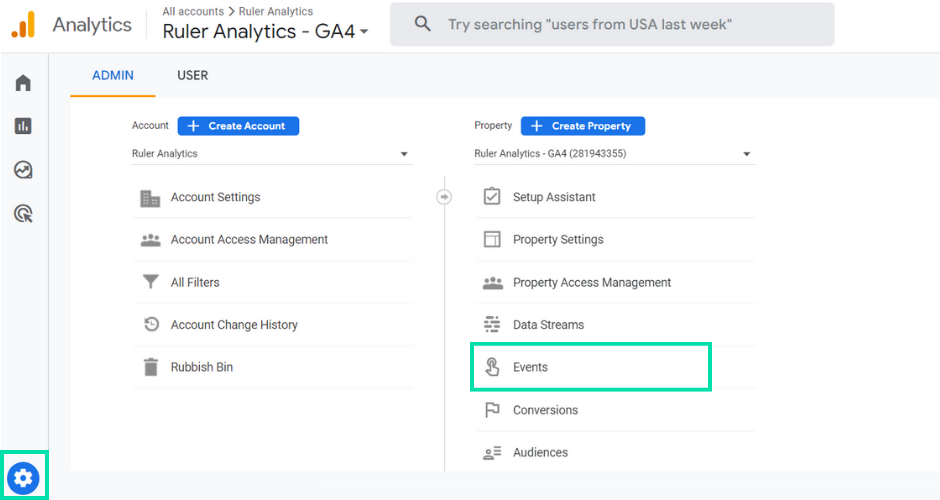
Set up custom events
Google Analytics 4 automatically tracks common events (e.g. pageviews), but it also allows you to create custom events to track information on your site that is valuable to your organisation.
You can create custom events directly in GA4 or with Google Tag Manager (GTM).
For the sake of this guide, we’ll be focusing on the first option, as it’s the easiest to navigate.
To set up custom events directly in GA4, go to Admin> Events.
In this example, we’re going to create a separate event just for our “book a demo thank you” page.
Enter a name for your event (it should be descriptive). Now it’s time to set up the Matching Conditions. Basically, Matching Conditions are used to specify the conditions that GA4 must meet to track an event.
For our example, we’ll be using the following matching conditions:
- event_name equals page_view
- page_location contains /thank-you-demo/
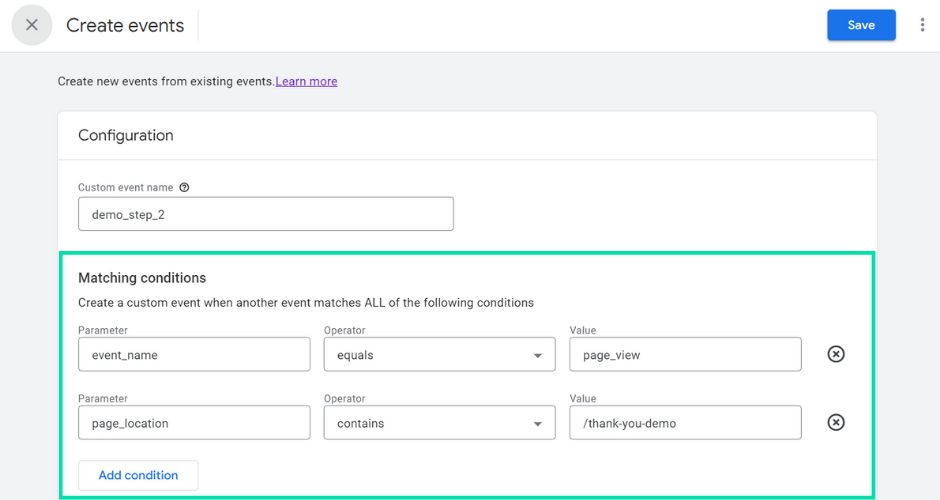
Hit save, and you’re good to go.
There are a few reasons why you might want to create custom events in GA4:
- To track specific actions that you want to measure. For example, you might want to track when a user clicks on a specific link or downloads a white paper.
- To get more detailed information about your website traffic. Custom events can provide you with information about how users interact with your website that is not readily available in the standard reports.
- To create custom reports. Custom events can be used to create custom reports that’ll display the data that you’re most interested in.
If you’re still unsure about event tracking in Google Analytics, don’t panic. We have a complete guide on GA4’s event tracking that covers the set-up in more detail, which you can find here.
Connect to other Google products
Google Analytics 4 allows you to connect it to other Google properties, such as Google Ads, Search Console, and BigQuery.
It’s worth noting that BigQuery is now available to all analytics users through GA4.
To connect with your other Google properties, follow these steps:
- Go to the Admin section of your GA4 property. In the Property column, select the property that you want to connect. Scroll down to the Product Links tab.
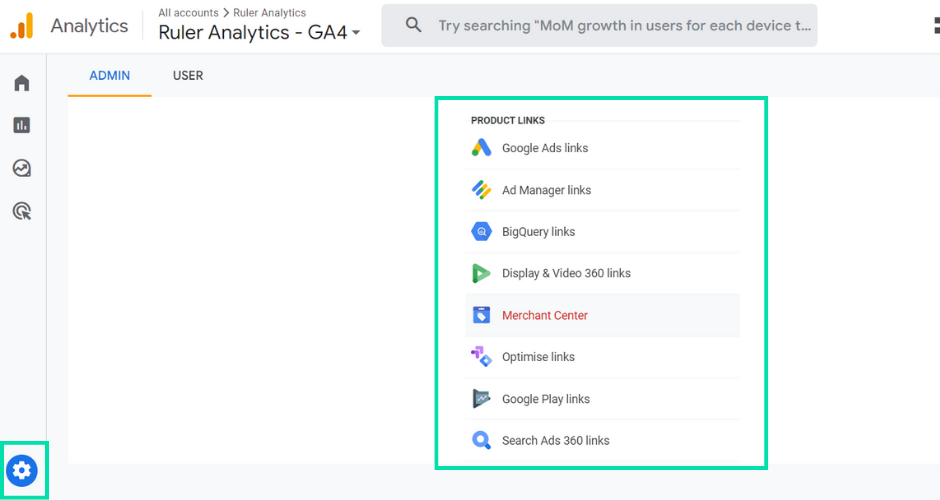
In the Product Links section, click on the product that you want to connect. Follow the instructions on the screen to complete the connection.
Once connected, you can view data from other Google platforms directly in your GA4 property.
For example, if you connect GA4 to Google Ads, you can view data about your ad campaigns in GA4. This data can help you to improve your ad campaigns and get more conversions.
Create custom reports
Google Analytics also offers custom reports that allow you to combine different metrics, apply filters, and answer specific questions important to your business.
For example, you could generate a report that provides insights into how users from a particular country engage with your website. Or, you could produce a report showcasing the usage patterns of users who have downloaded your ebook.
Custom reports help you build a more detailed picture of your key performance indicators (KPIs), allowing you to make better decisions about your marketing campaigns and improve your website.
To create a custom report, you will need to:
- Go to the Customisation section of your Google Analytics account.
- Click on the Custom Reports tab.
- Click on the +New Custom Report button.
- Enter a name for your custom report.
- Select the metrics and dimensions that you want to include in your report.
- (Optional) Apply filters to your report.
- Click on the Create button.
Getting the most out of Google Analytics 4
A well-structured GA4 setup is the difference between winning and losing.
By implementing these best practices, you can harness the power of GA4 to gain valuable insights into your user behaviour, marketing strategies, and website performance.
And when you pair up your Google Analytics with a marketing attribution tool, you can create a more complete picture of how users are finding and interacting with your brand.
Is Ruler the marketing attribution tool that you’ve been missing? Book a demo and see how Ruler can work with Google Analytics to bring you better insights and ROI.